

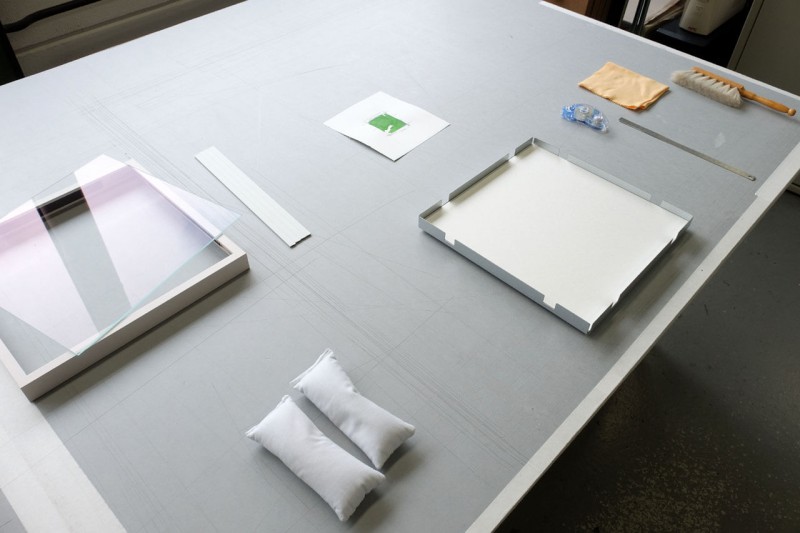
THE SPECIAL DESIGN FOR YOUR ARTWORK
Freely mounted with Gudy Dot
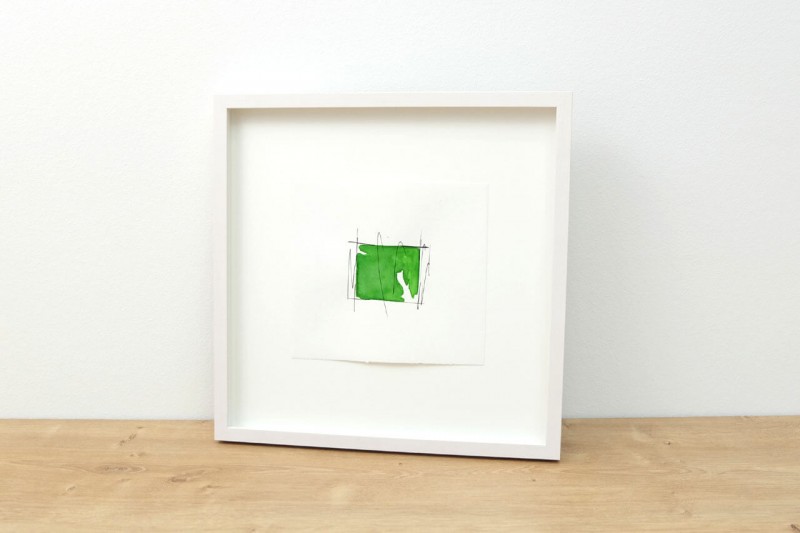
The image appears to float in the DISTANCE magnetic frame. It is fixed on the back side. Wavy paper and special edges are perfectly accentuated and a wonderful depth effect is created. The picture is smaller than the picture frame and the glass does not rest on the object.
Optional utensils:
- gloves
- hand brush
- cleaning cloth
Tools:
- steel ruler
- sandbag or empty water glass with rounded bottom
- soft pencil
This type of mounting is suitable for:
This type of mounting is ideally suited for wavy paper work with or without sensitive surfaces. This includes, for example, watercolours or works on deckle paper. But also prints, photos, chalk drawings and pastel drawings are perfectly accentuated with this type of assembly. Due to its low adhesive strength, however, this method is only intended for small and light works that do not require conservation.
This type of mounting is not suitable for:
This type of mounting is not suitable for heavy and large work, as more stable methods are required. Since it is difficult to remove the pictures from the back wall cardboard later and adhesive residues can remain on the picture, this method is not suitable for valuable pictures and originals.
Here's how it works:
1. Preparation
Open the picture frame and place all the necessary items next to you. For protection during transport, the glass is placed under the spacer strips as supplied.
2. Inserting
Insert the image into the basic element at the desired position by eye measurement. Tip: It is best to hold the paper diagonally and insert the image to avoid creases.
3. Measuring
Measure the exact position of your image. Since not all papers are always exactly right-angled, it is important to measure all outer edges to the sheet metal angle of the frame. It is best to measure not only in the center, but at all four corners. Take your time for this.


7. Laying on
Place the image on the adhesive dots and rub gently.
8. Glue bottom side
Now weigh the image down on the top and repeat the above steps for the bottom of the image. Here, however, the image must be bent back from the center to the edge to prevent waves from forming in the paper.
9. Dusting off
Carefully remove dust and foreign objects with a hand brush.
4. Weighing down
Now fix the picture on the bottom with the sand bags or empty water glasses.

5. Marking
Place a pencil dot at the top corners about 5 millimeters inwards for orientation. This serves as a mark so that the adhesive application does not extend beyond the paper.

6. Gluing
Now apply the Guddy Dot. Bend up the paper of the picture only slightly and very carefully. In our example, two glue spots of 30 millimetres each are sufficient. If the adhesive was positioned incorrectly, it can be rubbed off carefully with your finger.


Accessories:


11. Push the distance strips together
Push the distance strips against each other. This creates gap-free corners and a perfect fit is guaranteed.
12. Insert glass
Place the glass on the distance strips.
13. Wipe the glass
Use the cleaning cloth to remove dust and fingerprints from the glass.
10. Insert distance strips
Reinsert the distance strips into the basic element and make sure that the end of each strip is also located on an outer edge of the frame.


14. Framing
Place the overframe back on the element and press the frame lightly against it. The picture frame closes quickly and easily thanks to our magnetic principle.
Tip
The color of the back wall cardboard should be a shade darker or more yellow than the paper of the picture. So the picture generally looks whiter, fresher and newer.
Required utensils


Buy used articles in the shop

15. Ready
This type of mounting offers the ideal opportunity to frame artworks with special edges and sensitive surfaces. Every detail of your exhibit will be perfectly accentuated and become a real eye-catcher.
