ARTISTIC PRESENTATION IN A PICTURE FRAME
Silk scarf mounted in passepartout
What is the best way to present a silk scarf as a work of art? If you've been wondering this, then you've come to the right place! We'll show you how - in a picture frame, of course. Here you can find out what you should consider when choosing a frame, accessories and framing. Framing is possible in CLASSIC and Distance magnetic frame.
Note:
Many galleries and artists see visible photo corners as a quality feature for a glueless image montage. We prefer to cover the corners.
This type of mounting is suitable for:
This type of frame is ideal for small to medium-sized, flat paper works with sensitive surfaces, such as prints, photos, drawings and sketches, or valuable works and originals with special conservation requirements. One advantage is that the picture can be easily framed-out at a later date and no residues remain on the picture. The plastic photo corners are well suited for photo prints and the folding passepartouts are particularly advantageous for frequent image changes. The picture with the passepartout lies protected on a back wall, can be easily removed and stored safely.
This type of mounting is not suitable for:
This type of mounting is not suitable for large, thin papers that collapse and can slip out of the photo corners at the top, as well as for 3D objects and works on thick cardboard.
Here's how it works:
7. Attach photo corners
Carefully attach the photo corners so that the corners of the paper do not bend. Leave about 1 millimeter of air in the corner to the paper.
8. Check
Close the passepartout and check if the corners are completely covered. Tip: If the corners are not fully covered, they can be attached at the top with more air to the picture. If this is not enough, the corners must be cut smaller.
9. Glue on photo corners
When everything fits, remove the protective film from the corners. Bend up the paper (e.g. with a ruler) and carefully reattach the corners. Again, let 1 millimeter of air in, stick the corners onto the background cardboard and press them down well.
4. Positioning
Works with uneven edges are best positioned by eye measurement in the cut-out. Other works, on the other hand, can be easily measured.

5. Fixing
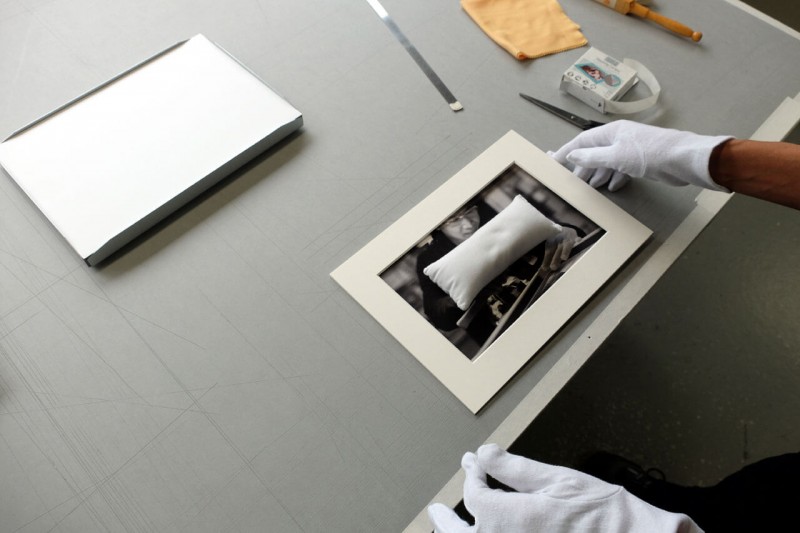
Place a sandbag or empty water glass in the middle of the image to prevent it from slipping.

6. Prepare photo corners
Cut the photo corners together with the protective film from the roll.


11. Close the folding passepartout
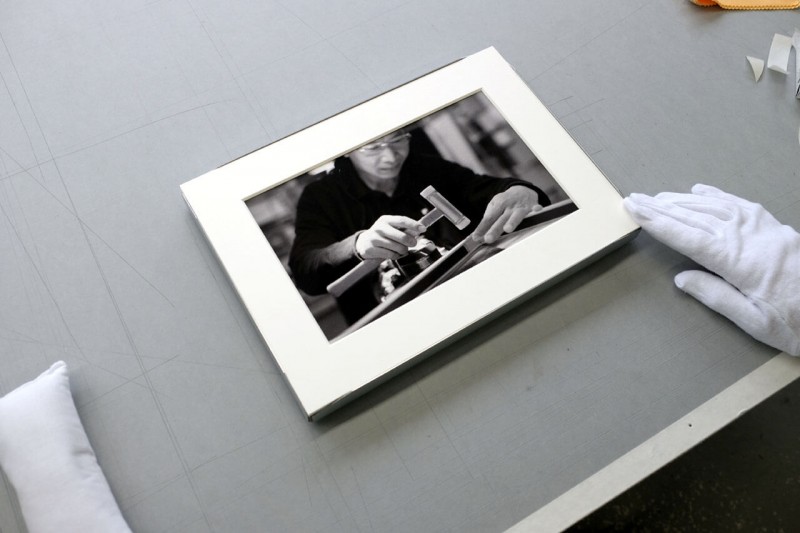
Close the passepartout and check the position of your picture.
12. Insert into frame
Now insert the folding passepartout with picture into the basic element. Consider the thickness of the folding passepartout in the insertion depth of your picture frame.
13. Insert glass
Now carefully place the glass back on the basic element.
10. Cleaning
Carefully remove dust and foreign matter from your image and the back cardboard.


14. Wipe glass
Use the cleaning cloth to remove dust and fingerprints from the glass.

15. Put on overframe
Now put the overframe back on again and press it down. Due to our magnetic frame principle, each picture frame closes magnetically.
Further possibilities to use a folding passepartout:
Folding passe-partout picture free - Gudy Dot - Classic
Folding passe-partout motif free - Klug photo corner - Classic
Silk is particularly thin, so it is best to frame your silk scarf in a CLASSIC with passepartout frame. A typical silk scarf size is 900 x 900 mm. To give your scarf enough space and to be able to use an additional passepartout, we recommend that you choose a slightly larger picture frame. Many of our customers opt for a picture frame measuring 1000 x 1000 mm.
To present your silk scarf in the best possible way, choose a passepartout cut-out that is about 20 mm smaller than the scarf itself. This means that the optimum size of the cut-out for a scarf size of 900 x 900 mm is approximately 880 x 880 mm. It is important to determine the exact dimensions of the scarf in advance.
With a CLASSIC frame, the glass of the frame rests directly on the passepartout, and the light scarf is already largely held in position by the pressure. This fixation is normally sufficient. If the scarf still slips, you can fix it inside the frame using the Gudy Roller Dot.

Alternatively, you can also use a DISTANCE frame. The DISTANCE has spacer strips that create a small gap between the base element and the glass, making it ideal for small three-dimensional objects. In this case, the scarf is not flattened, but it is not fixed by the glass pane either, which is why you have to fix it in another way.
One option is to fix the scarf in a free-floating position with small pins. You can arrange the scarf as you wish in the basic element and admire it in full size. The pins can be inserted through the cardboard into the hard foam panel in the base element of the frame. Alternatively, the DISTANCE frame can be fitted with a magnetic back panel for an additional charge.
This allows you to attach the silk scarf to the frame using small neodymium magnets, thus preventing damage to the scarf. The disadvantage of using pins or magnets for fixing is that they will be visible on the scarf despite their small size.

Tip:
Silk scarves with lines around the edge can be a challenge to position, as the thin fabric makes it almost impossible to get the lines perfectly straight. A simple trick is to choose a mat cut-out that is large enough to completely cover the edge, including all the lines. This way, your scarf will appear perfectly framed without having to be perfectly straight.
To do this, first remove the overframe, the glass and the passepartout. Position your scarf exactly in the frame. Just fold back the top end a few centimeters. Then apply a few strips of Gudy Roller Dot to the top end of the fabric on the rigid foam board of the frame.
Before you fold the scarf back and press it firmly onto the adhesive tape, make sure that it is still in the correct position. The fact that the adhesive strips are only attached to the upper part of the rigid foam board allows the scarf to hang freely downwards and prevents creases from forming.
The passepartout should completely cover the edges of the scarf. Finally, insert the glass and attach the overframe - done!


CLASSIC
DISTANCE


